Create Custom Recipients
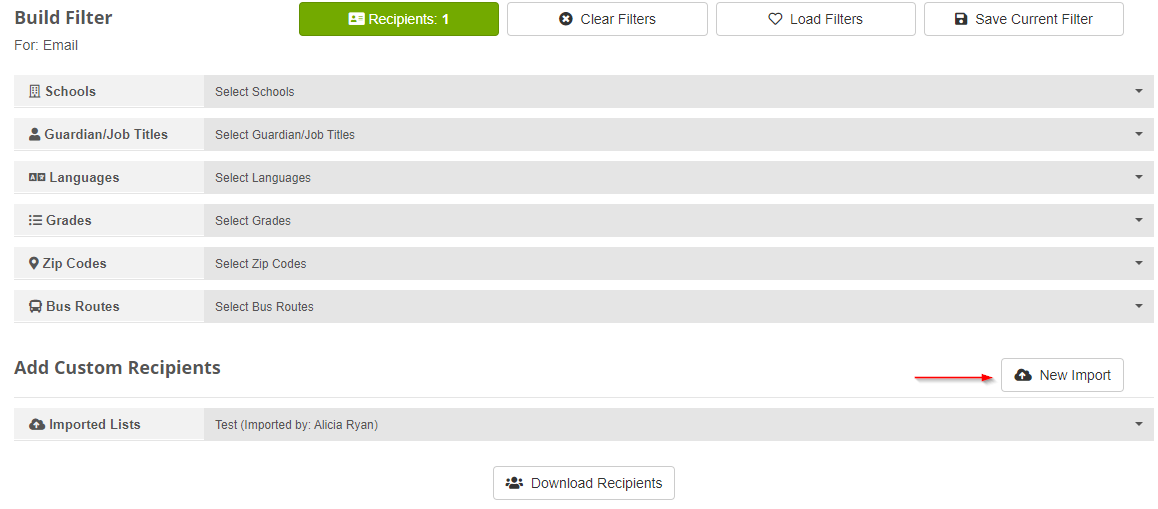
In step two of sending a message, you can import your own list of contacts or use a list that someone else at your site/district office has shared with you.
You can also do this from Manage Imports on your CONNECT dashboard.
Custom recipient lists always add on to any of your “build a filter” recipients. For example, if you select a language in your filter, it has no affect on your custom recipient list.
Import your own list
-
Create a spreadsheet (in Excel or Google Sheets) with four columns: Name, Email, Phone, Language.
-
Enter the contacts you need in the rows below.
-
Select and copy your information.

-
Return to the recipients page (or Manage Imports) in CatapultCONNECT.
-
Choose New Import.

-
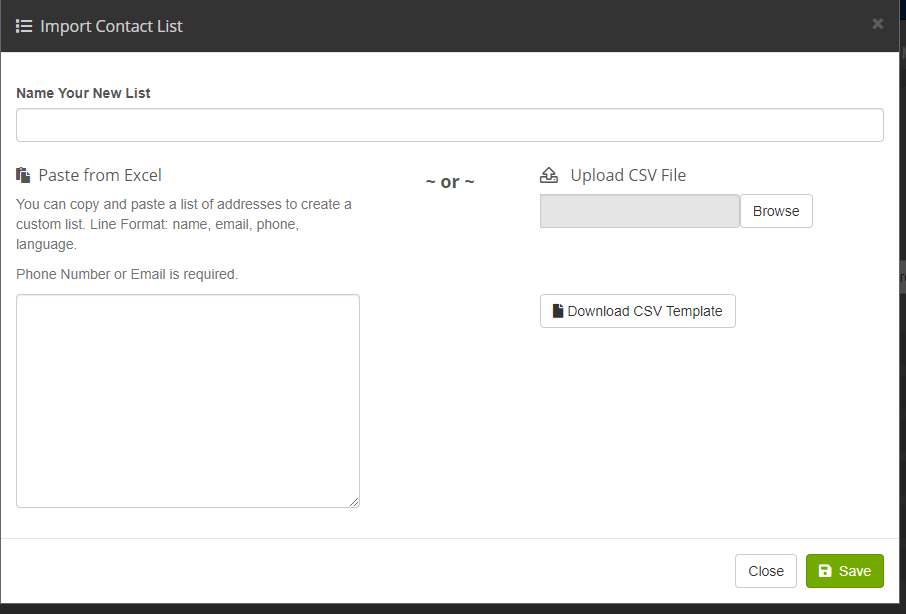
Under Name Your New List describe the list you are importing so you recognize it later. Tip: if you choose the exact name of a previously imported list, CONNECT merges your new contacts with the existing list.
-
In the text area under “Paste from Excel,” paste the information you copied in step 3 above. Avoid editing the text after you paste it (even though it might not look as pretty as it did in your spreadsheet).

-
Choose Save.
-
Review the message about your upload then choose Close. If you selected the headers in step 3 above, it might include a message about omitting line 1.
If you choose the Imported Lists drop down, you’ll see a check mark next to the list you just imported. In the future you can reuse the list by selecting it here.
Pasting from Excel or Google Sheets is a simple method to import additional contacts. But if you are more tech-savvy and work with CSV files, there is an option for a .CSV import as well.

Next
After importing a list, you may want to manage imports, preview the recipients or continue to step 3 of sending your message.
