
Step-by-Step Guide
1. Place Your Calendar Element
First, decide which page on your website will display the calendar(s). Here’s how to add it:
- Go to the PAGES panel, find your chosen page, and click EDIT.

- In the EDIT PANEL, select the CALENDAR icon and drag it into one of the red-outlined content areas on your page.

2. Sync Your Google Account
Next, you’ll sync your Google Calendar to your website.
- Click the pencil icon in the top right corner of the calendar template (or anywhere inside the calendar space) to open a pop-up window.
- Select ADD GOOGLE ACCOUNT(S)/CALENDAR(S).

- A new window will appear. Click the green MANAGE ACCOUNTS button in the top right corner, then click ADD ACCOUNT.


- Log in to the Google account associated with the calendar you want to use.
- Allow CatapultCMS to access your Google account by clicking ALLOW.
- You’ll see a list of Google accounts that have been synced. Click FINISHED to complete the process.
3. Display Your Calendar
Now that your Google account is connected, it’s time to display your calendars.
- In the MANAGE GOOGLE CALENDARS window, you’ll see two sections: MY CALENDARS and OTHER CALENDARS (for any shared calendars).
- Check the box next to each calendar you want to show on your site, then click OK.
4. Customize Your Calendar Display
You can choose how your calendar appears on your site:
- Calendar Mode: Pick between Full, Event Feed, or Week view. The Event Feed is often used on the homepage, with the full calendar on a dedicated calendar page.
- Show Link to Google Calendar: Adds a Google Calendar icon and link below your calendar.

- Show Print Icon: Adds a Print button above the calendar.

- Show Calendar List: Adds a dropdown list of available calendars in the top right corner.
- Show Calendar Legend: Displays a color-coded legend below your calendar to indicate event categories.


5. Change Your Calendar Color
Want to match your calendar’s color to your brand or team colors? Here’s how:

- Open the GOOGLE CALENDAR window by
- clicking on your calendar.
- Click MANAGE CALENDARS to open the settings.
- Next to the calendar you want to customize, click the arrow on the color bar.
- Choose a new color from the COLOR CHOOSER. You can select from Web, RGB, or HSB options to find the perfect shade.
- Click SELECT, and your calendar will now display in the chosen color.
6. Make Your Calendar Public
Ensure your calendar is visible to everyone by making it public:
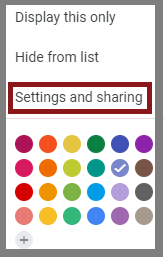
- Go to calendar.google.com, hover over your calendar’s name, and click the three dots.
- Select SETTINGS AND SHARING.
- Scroll down to ACCESS PERMISSIONS and check the MAKE AVAILABLE TO PUBLIC box.
- From the dropdown menu, choose SEE ALL EVENT DETAILS to allow viewers to see full calendar events.
- Click SAVE to confirm your settings.
Repeat these steps for any additional calendars you’ve synced to your site, and you’re all set!